I am a Full Stack Developer, but still learning stuff and I consider myself naive, so please take this with a grain of salt.
Developing a web app is fun, writing UI components, defining API endpoints, and designing database schemas is very interesting and can be very enjoyable and a great learning experience. But after you are done developing it locally how would you showcase this to the internet or put it into an actual production environment. I am obviously talking about very small systems here <1k requests a day, where scalability is often not an issue.
- 1. Virtual Private Server (VPS)
DigitalOcean Droplet, AWS EC2, Google Cloud Compute Engine - 2. Self-hosting on your old computer
Raspberry Pi - 3. Using out-of-the-box services
Vercel, Supabase
Youtube video showing live demo, of integrating hosting with CI/CD.
Common steps for method 1 and 2:-
1. Cloudflare Tunnel
Instead of directly exposing the IP address of your wifi or of your VPS, I recommend using a Cloudflare tunnel, as it hides your IP address, protects for DDOS and DOS attack out of the box, also gives features like Geo fencing if necessary. It is a free service, not necessary to purchase domain names from them.
2. Docker
In methods 1 and 2, you need to dockerize your stuff which is easy for management, and push your code. Because, there could be a simple dependency issue, for eg, you are using the MySQL-connector library for your endpoints to interact with your database. But let’s say this library is not supported for a particular Linux Distro, this could result in changing the code and could be very annoying.
Or let’s say you need to use a mysql server, if you don’t use docker you will need to download it, install it, configure it etc, but with docker just pull the mysql image, spin up the container and then you have it ready.
So using docker, is like having a “small exact copy of a virtual machine” everywhere, and having that docker container (“Virtual machine”) run everywhere.
Another benefit is the support of docker-compose, which can easily help you manage multiple docker containers, and how they would interact with each in its docker network.
Make sure when you build the docker images, build and run them as the least privileged user, so the intruder cannot exit your docker container, or execute shell scripts inside the docker container terminal.
3. Docker watchtower
Once you build and push the images to the docker hub, they need to be updated on the server right? So Docker Watchtower comes into play here. Docker Watchtower automatically pulls the images from the docker hub and rebuilds them automatically.
And as we are using docker-compose, we can also smoothly integrate docker watchtower in our containers. Make sure your repository on the docker hub is public so Watchtower can pull the images.
4. Connecting Docker watchtower and Cloudflare with your Docker app in docker-compose file
Directory Strucuture:-
/
├── cloudflared/
│   ├── config.yml
│   ├── credentials.json
├── docker-compose.yml
credentials.json:-
{
 tunnel: xyz
 credentials-file: /etc/cloudflared/credentials.json
 ingress:
   - hostname: commonTextStyle.foo  // domain name
  // service name and the port of the container which is being exposed
     service:  http://portfolio:8000
  - hostname: books.commonTextStyle.foo  // domain name
     service:  http://books:8001
  - service: http_status:404

}
config.yml:-
{
  "AccountTag": "abc",
  "TunnelSecret": "bigpass",
  "TunnelID": "xyz"
}
Important:
- You need to have the domain names in the DNS record on cloudflare to connect it with your tunnel.
- Don’t share these credentials with anyone or anyone could spoof your tunnel.
I prefer to run cloudflare inside the docker container, for easier management and no need to do any external setup on the host machine.
Docker-compose file part of Cloudflare and Watchtower:-
Docker-compose file
cloudflared:
  image: cloudflare/cloudflared:latest
  container_name: cloudflared
  volumes:
    - ./cloudflared/credentials.json:/etc/cloudflared/credentials.json:ro
    - ./cloudflared/config.yml:/etc/cloudflared/config.yml:ro
  command: tunnel --config /etc/cloudflared/config.yml run
  restart: always
  deploy:
    resources:
      limits:
        cpus: '0.3'
        memory: 256M
  cap_drop:
    - ALL
  read_only: true
  depends_on:
    - portfolio
  labels:
    com.centurylinklabs.watchtower.enable: "true"
  networks:
    - isolated_network

watchtower:
  image: containrrr/watchtower:latest
  container_name: watchtower
  volumes:
    - /var/run/docker.sock:/var/run/docker.sock
  restart: always
  deploy:
    resources:
      limits:
        cpus: '0.3'
        memory: 256M
  environment:
    - WATCHTOWER_LABEL_ENABLE=true
    - WATCHTOWER_POLL_INTERVAL=60
  command: --cleanup portfolio cloudflared
  networks:
    - isolated_network
5. Spinning up the containers.
Step1:- Get inside the remote server
To transfer the files from host to server you can use scp command:-
scp -r /local/directory username@remote_host:/path/to/remote/destination/Have your pi up and running with:-
- Raspberry Pi OS installed
- Docker and Docker Compose installed
- Remote Desktop enabled

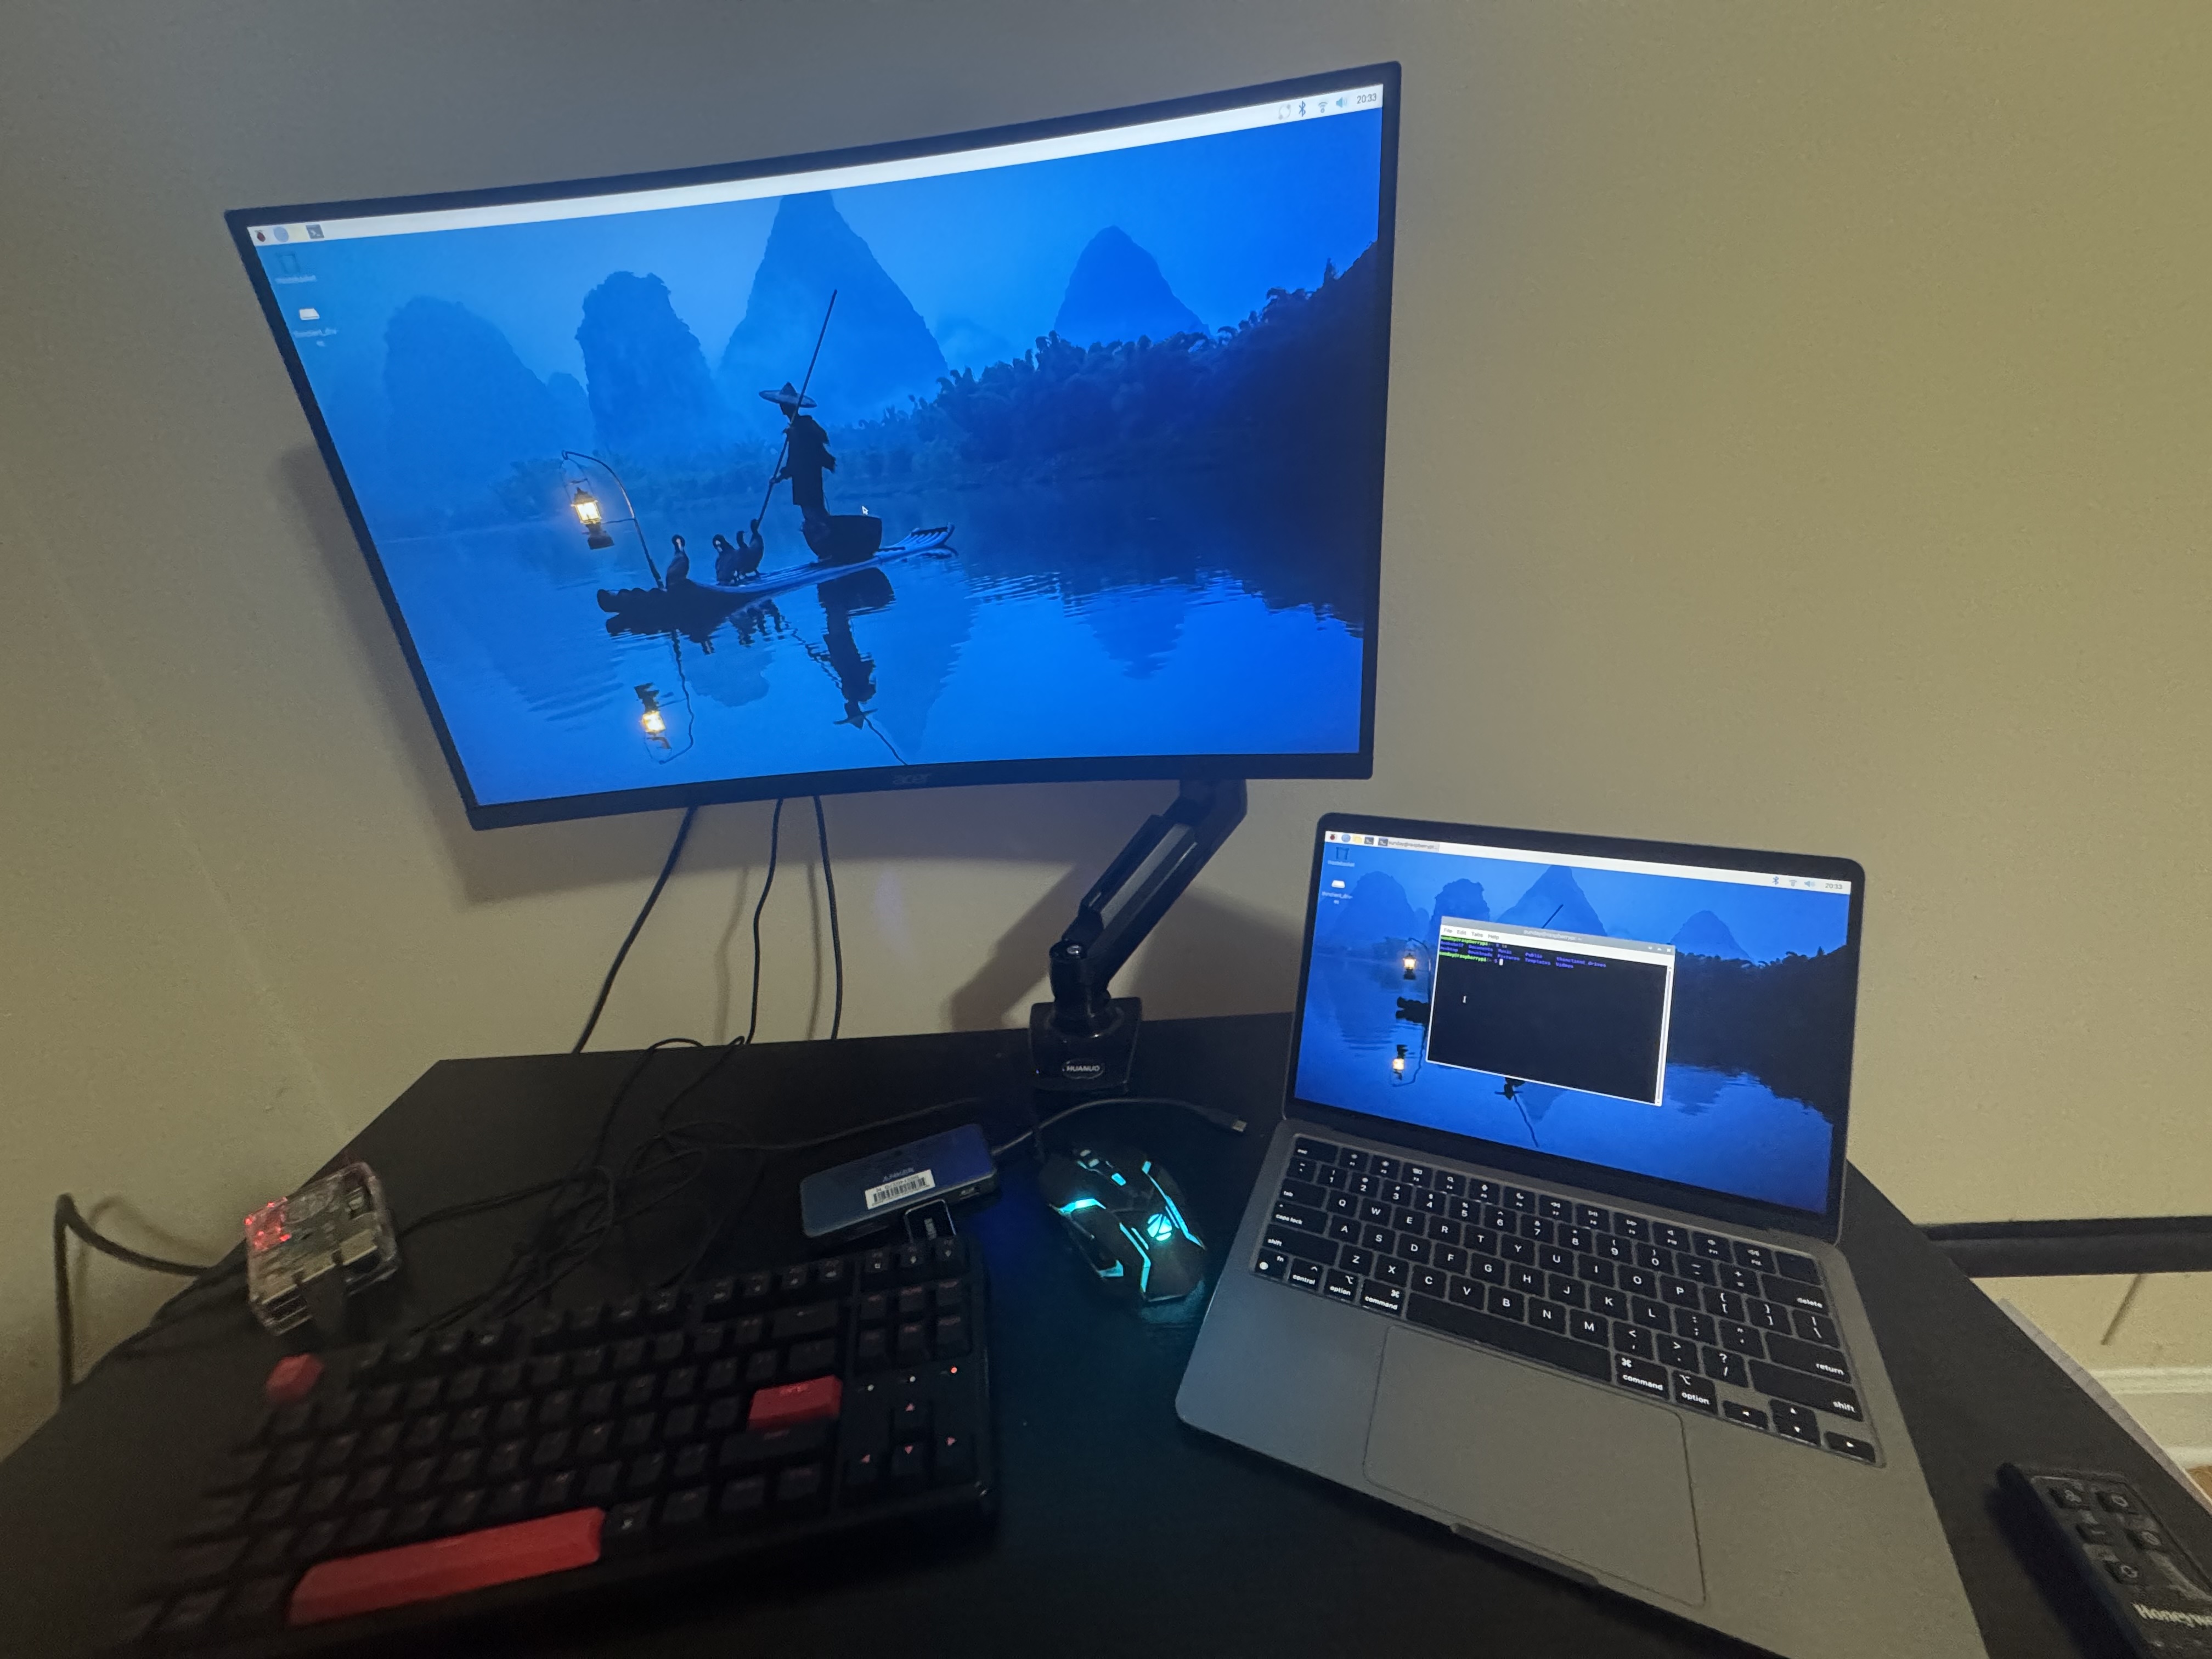
PI in Action
After having files on the server:-

SSH Into PI

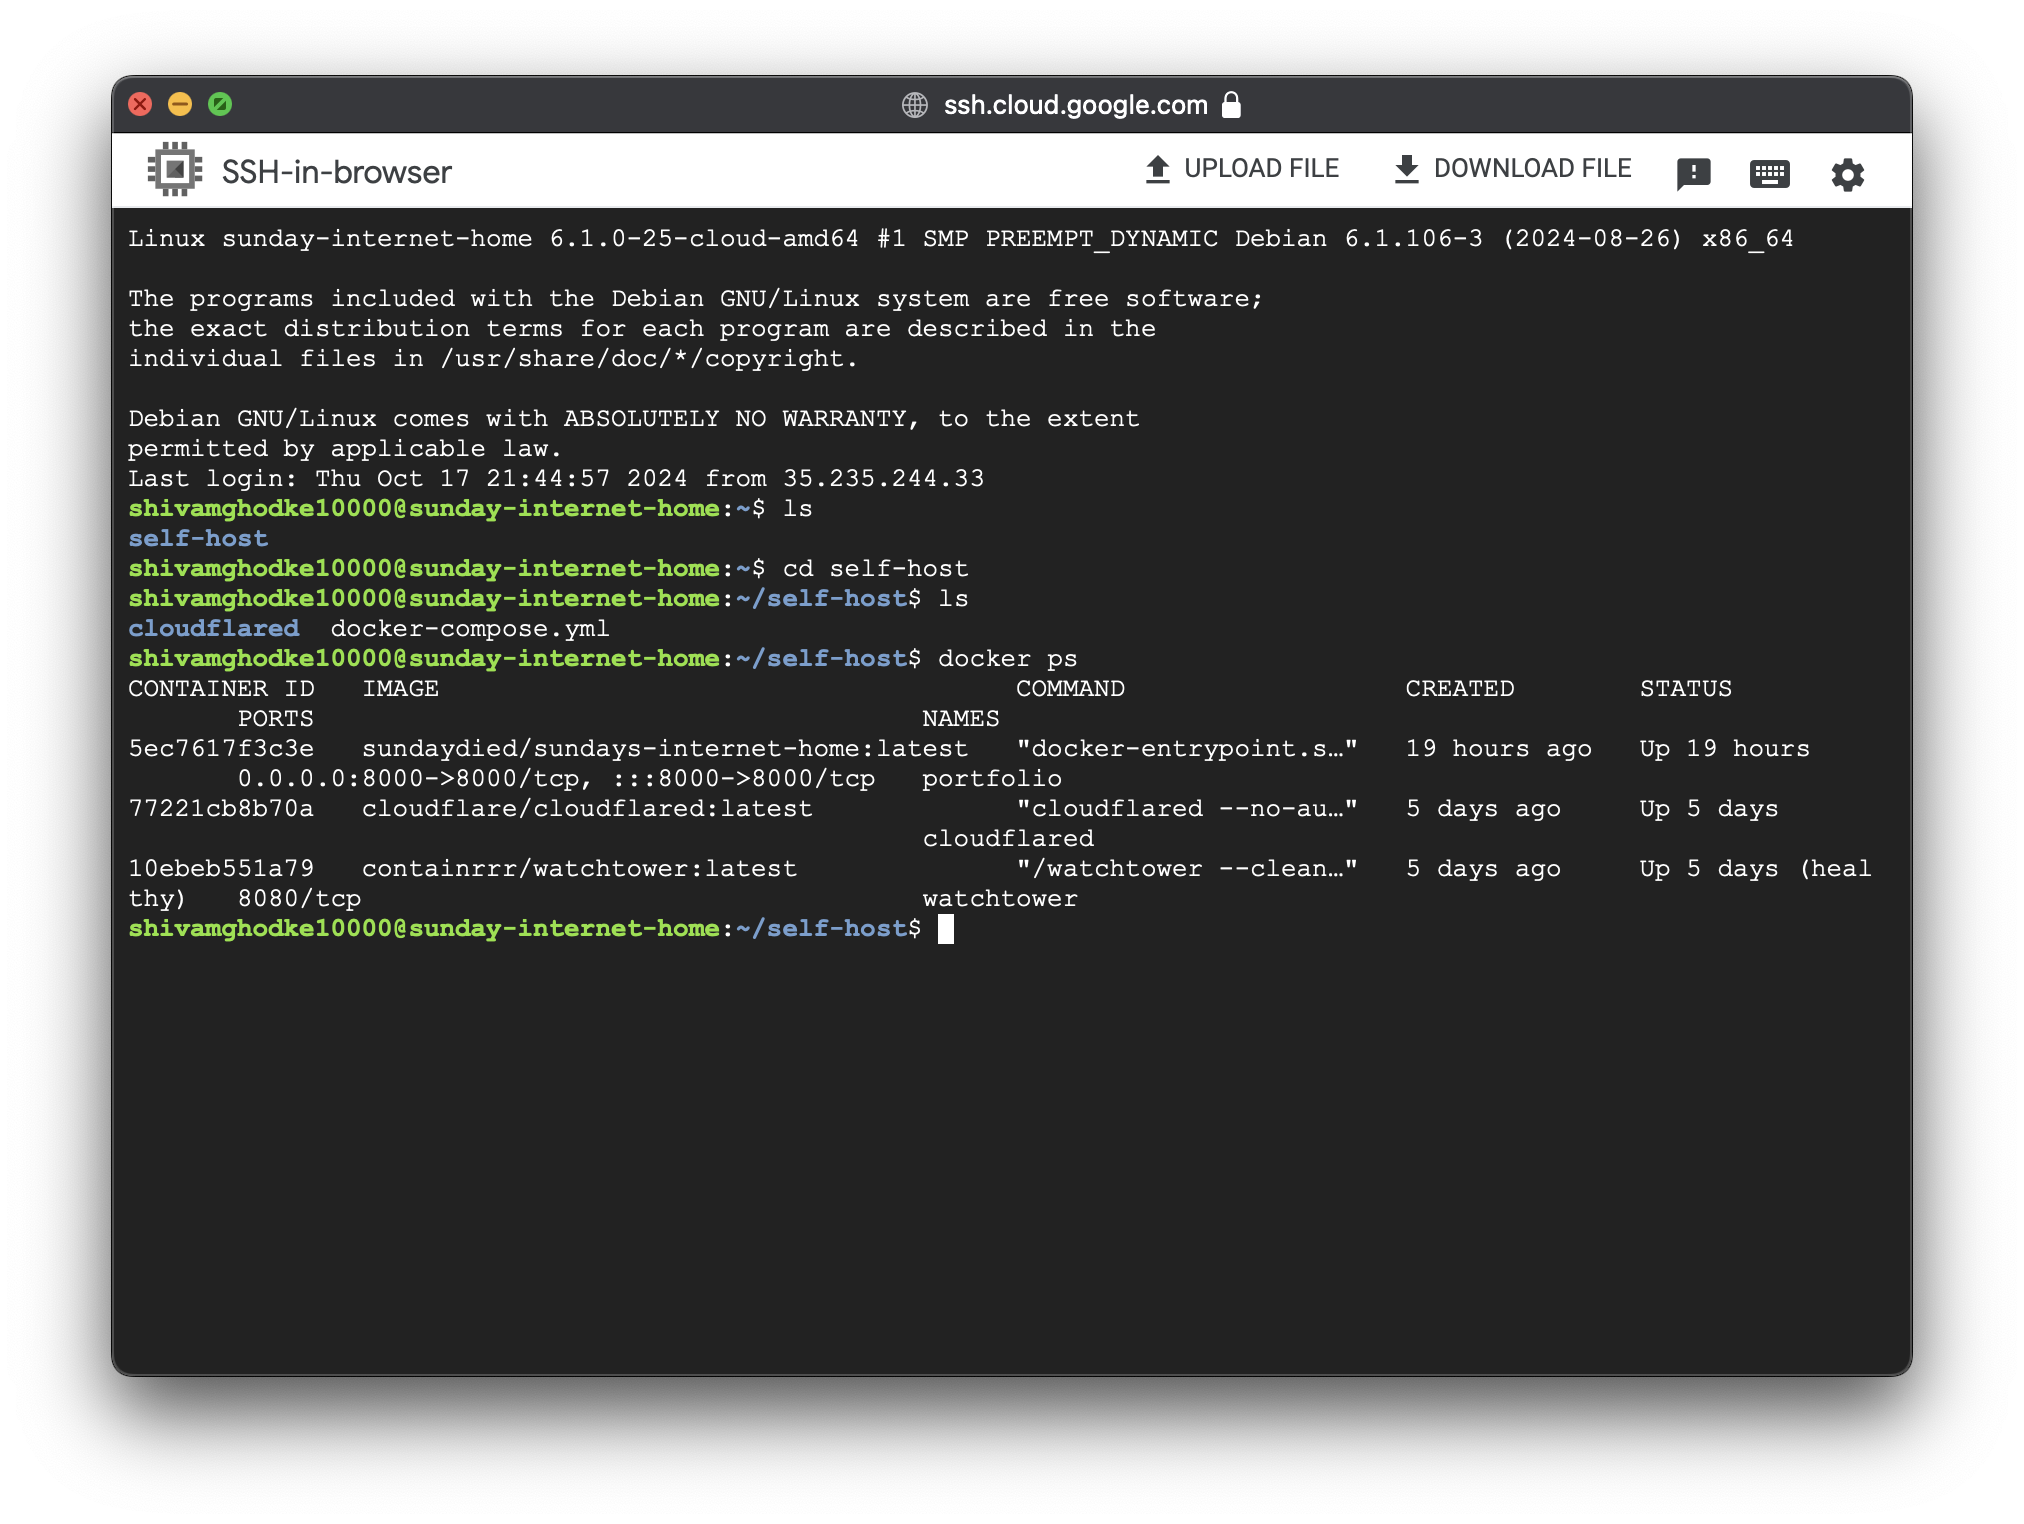
SSH Into Google Cloud
Spinning up the containers:-
This will build the service and could be accessed anywhere on the internet.
docker-compose up –build -dExtra security steps for pi (method 2):-
1. OpenVPN:-
Using openvpn protocol and service of your choice (mine is Surfshark), connect to the nearest remote server, so we have added protection layer for the request to bypass.
2. Firewall configurations:-
Having strict firewall configuration, restrict all the ports on your pi, and only open the required ports as needed.
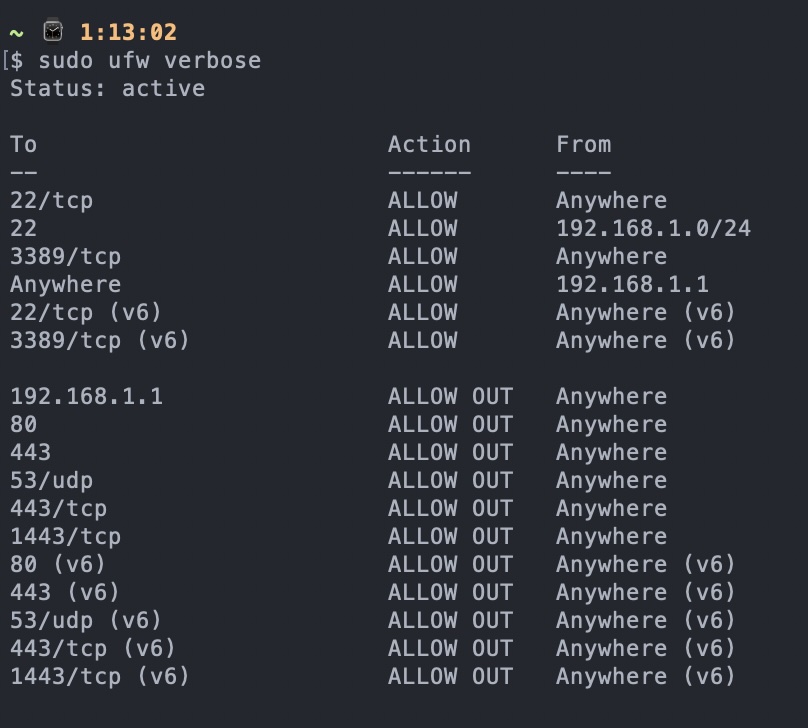
Ufw rules:- Only allowing incoming ports for:- ssh, internet and rdp (remote desktop) Outgoing ports for:- VPN, internet, and to router only, not other devices. You can verify up, you should be able to ping pi from any other machine on the network, but vice-versa not possible.

Firewall Configuration on Pi
Different subnet:- If your router allows, just create a different guest network so your pi and other devices are totally on different networks and cannot talk to each other.
3. Additional Steps:-
When you build your Next js app using GitHub actions it takes up a lot of time, This action, built the Next js app, created its image and pushed it to Dockerhub.

Time for Github actions to build the next js app, build and push the image on Dockerhub.
So I decided to use git pre-commit hooks, what this does is, build the Next js app locally, create a docker image, spin up the container, and if you like it and everything looks fine, you enter “Y”, then it cleans up the container, and add the build files and pushed it GitHub, and the GitHub actions builds the container, and pushes to docker hub without building next js app.
Reducing the build time to <1min.

Reduced time after locally building the next js app.
Here is the .git hooks precommit file, which runs after you enter commitView the shell script
Method 3:-
1. No need to dockerize, no need to setup CI/CD pipeline to build your NextJS app or anything, directly use Vercel, which simply lets you deploy your NextJS app on it, as it handles all the configuration underhood and you need not worry about anything. Using Vercel saves you a lot of time, and you need not need to even create an account on Amazon and get your EC2 instance, or dockerize any shit in the first place. It also comes out of the box with features like caching and DDOS attacks protection.
2. Using Supabase for databases is like already having a MySQL server setup in the cloud for you, without you needing to do anything. Directly gives you SDK to interact with the database reducing complexity.
| Type | Details |
|---|---|
| [email protected] | |
| Github Repository | https://github.com/nuttysunday/sundays-internet-home |
| Website | https://shivam.foo/ |
| Blog | https://shivam.foo/blogs/self-hosting |
| Github Profile | https://github.com/nuttysunday |
| Twitter Profile | https://x.com/sundaycide |
| Resume | View Resume |
